Black Magic Davinci Resolve custom transitions installation
after you purchased/downloaded one of my transitions pack you end up with ZIP file in your download folder. (free transition sample for you to test out HERE)
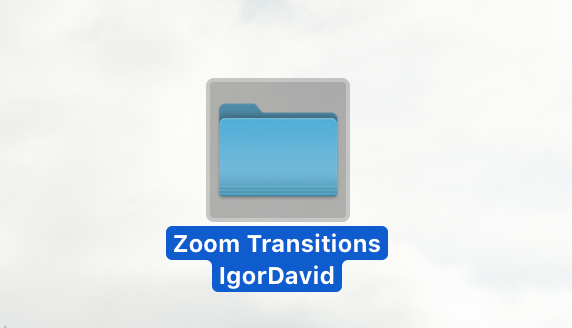
go ahead an unzip folder to see content inside- if should be folder with Davinci Resolve project for example: Zoom Transitions-IgorDavid.drp. along with .jpg or .png media and manual.
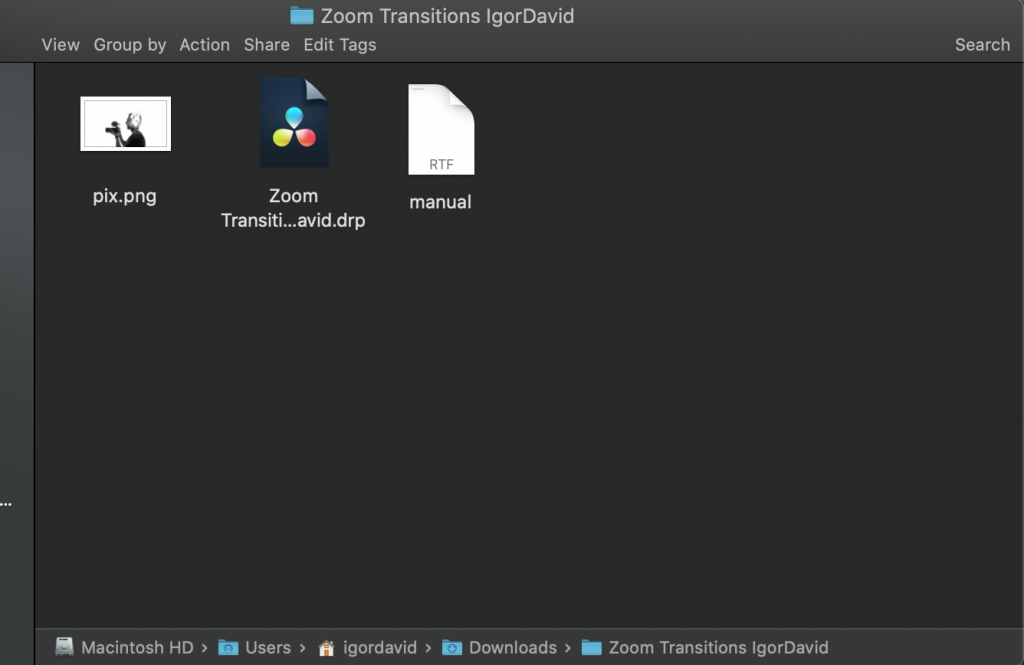
at this point you need open that “.drp” file , just double click and it opens new project in Davinci Resolve , project name is set to “Zoom Transitions-IgorDavid”.
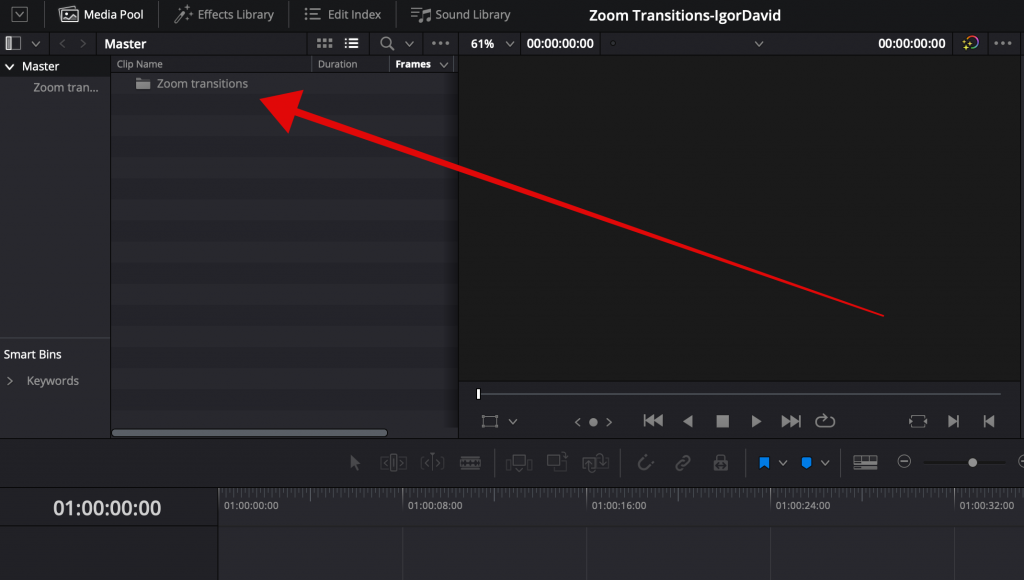
click on “Zoom transitions” in “Master”…..
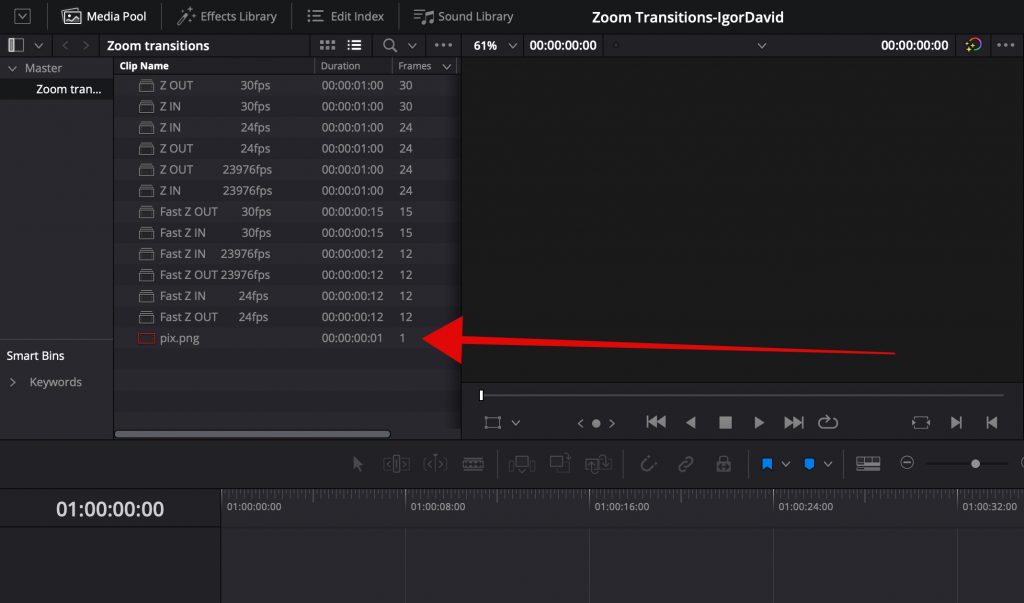
and here are all transitions in available frame rate (23.976fps , 24fps, 30fps….). along with media file which is red color and you need to relink it by right click…
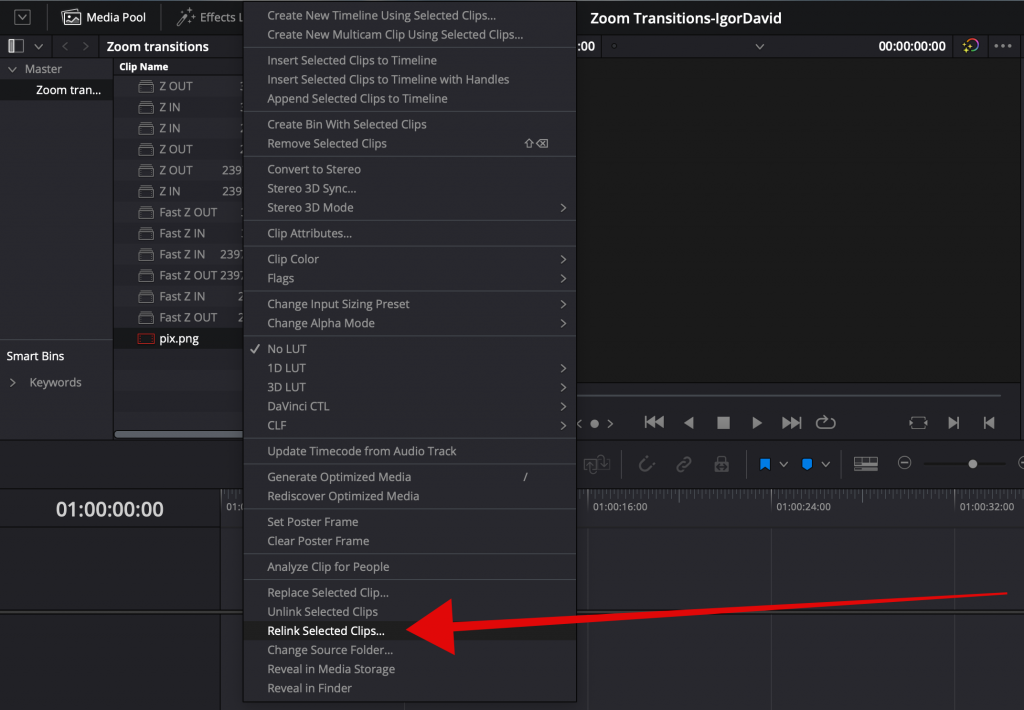
click “relink selected clips” and navigate it in to the “Zoom Transitions IgorDavid” folder you just downloaded …
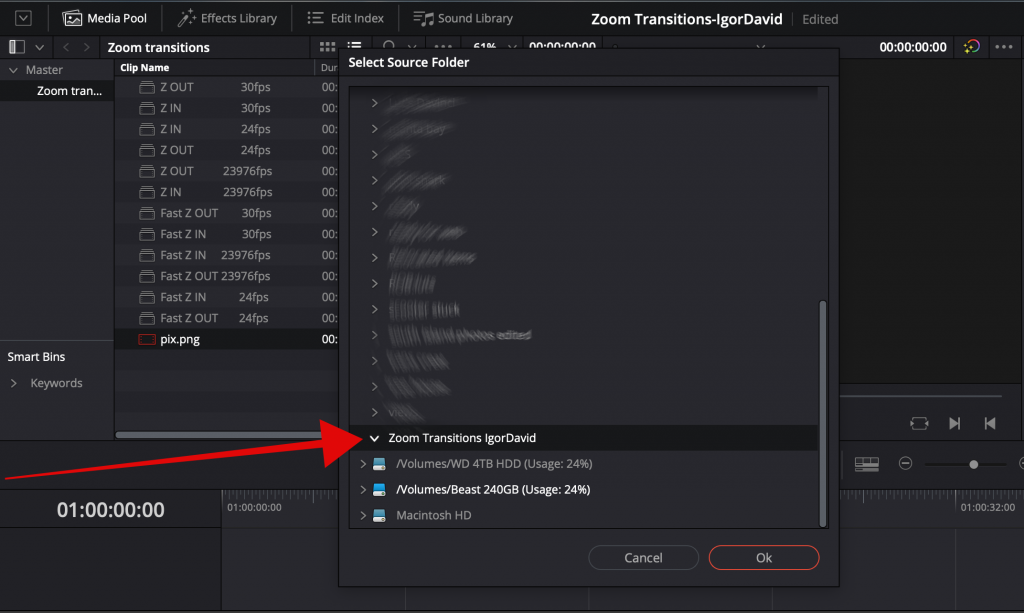
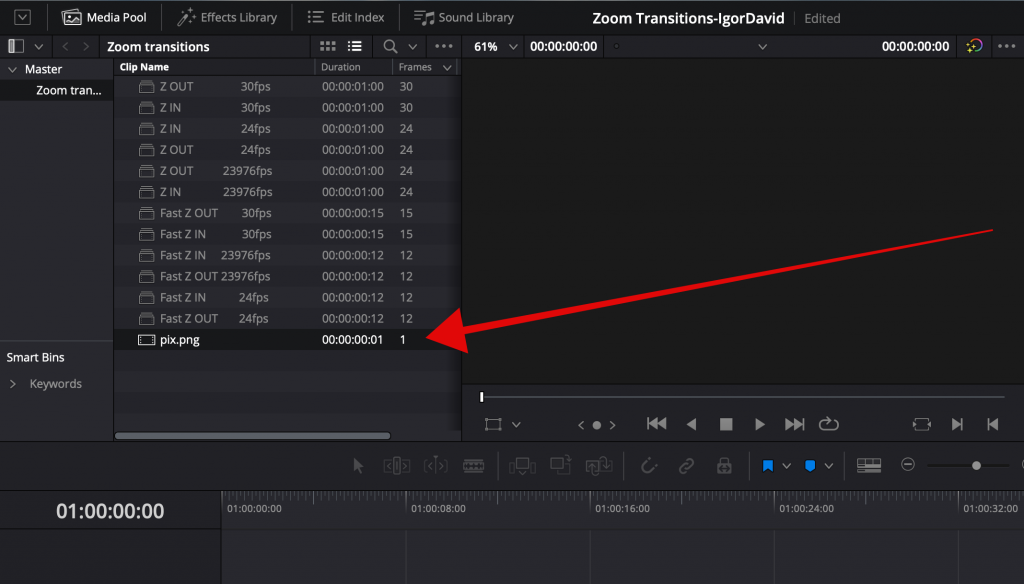
Davinci Resolve will access the missing media and red color should disappear .
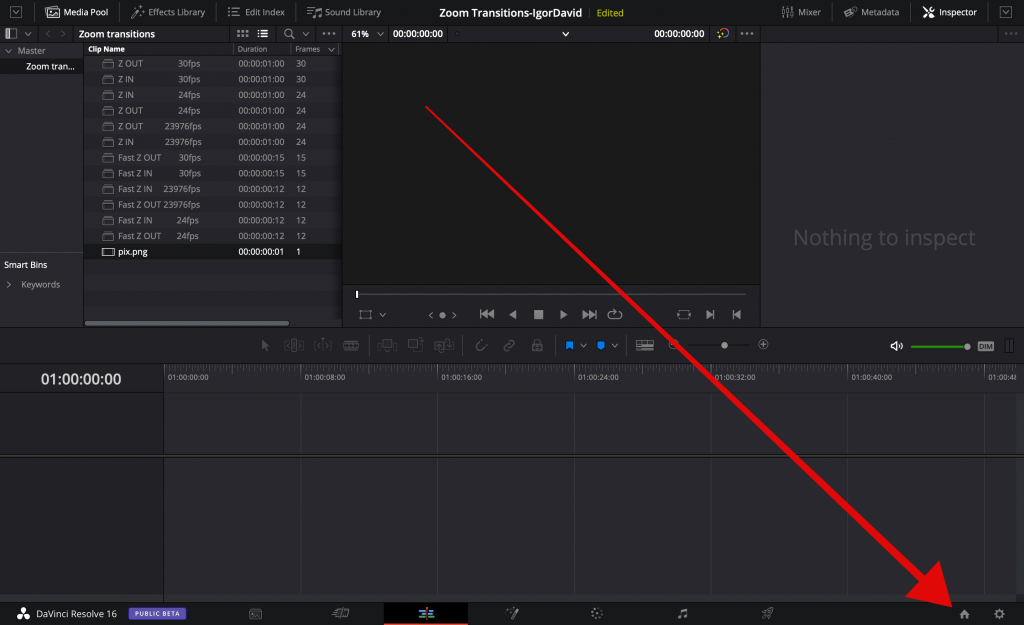
at this stage you need to click home icon in bottom right corner…
here you right click on Zoom Transitions-IgorDavid and click Dynamic Project Switching
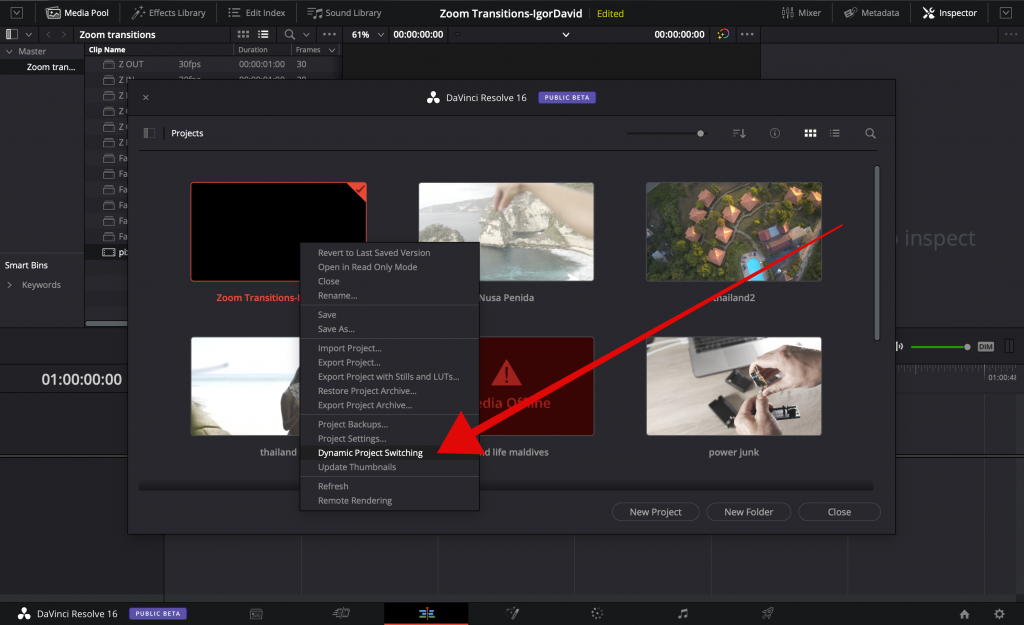
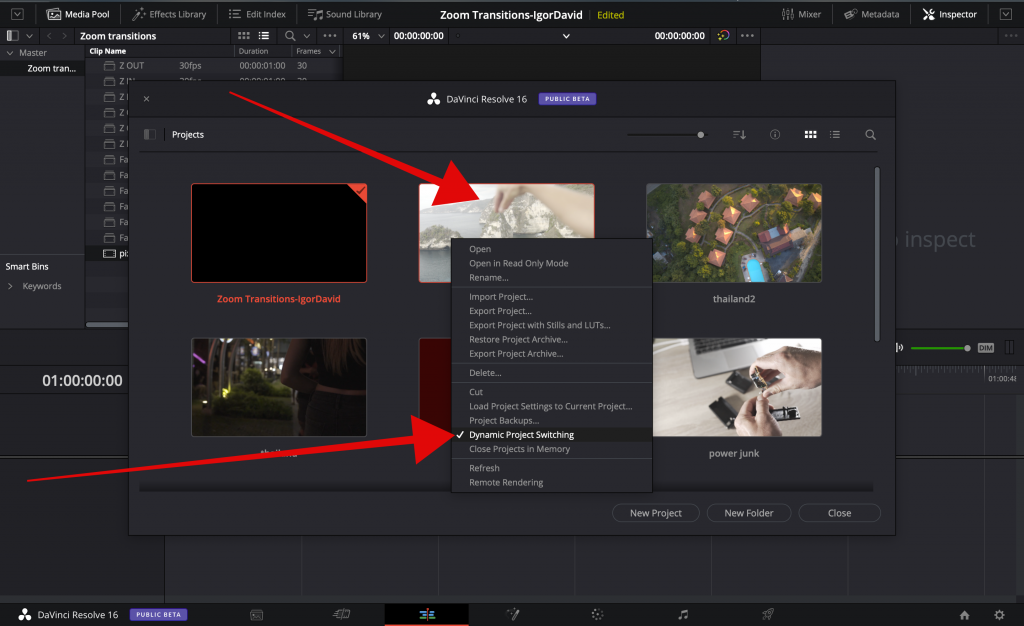
next step : click your project (project where you want to use transitions) and right click to select Dynamic Project Switching. and go back to the Zoom transitions project
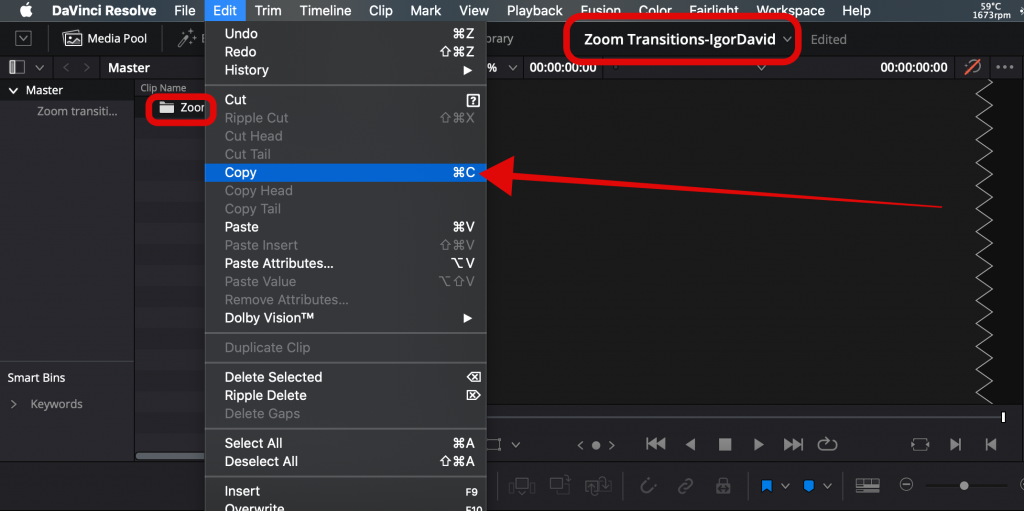
here you copy the Zoom transitions folder and look for small drop down window next to the current project name…
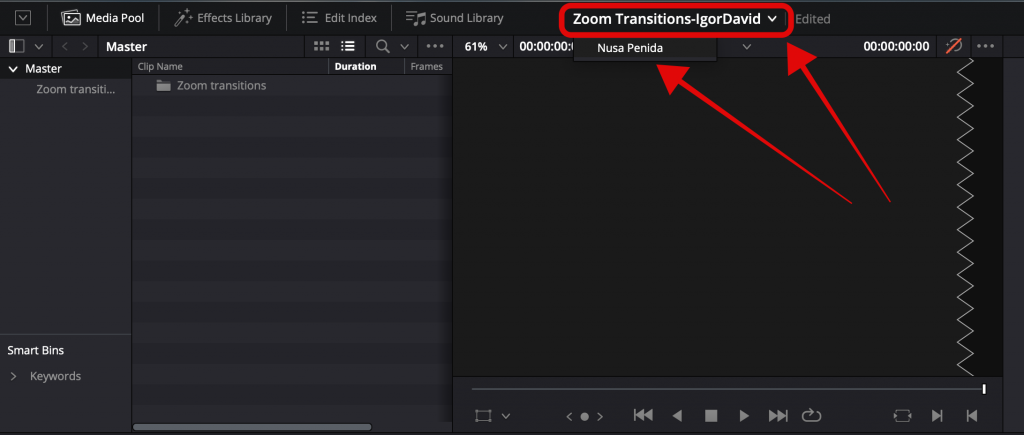
click the project (in my case “Nusa Penida”) and simply paste the selected folder under Master folder in media pool.
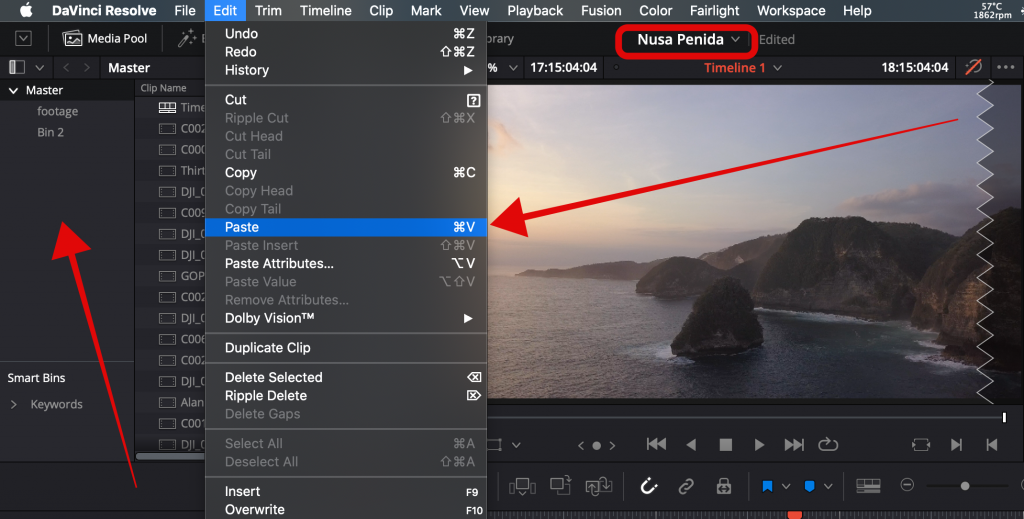
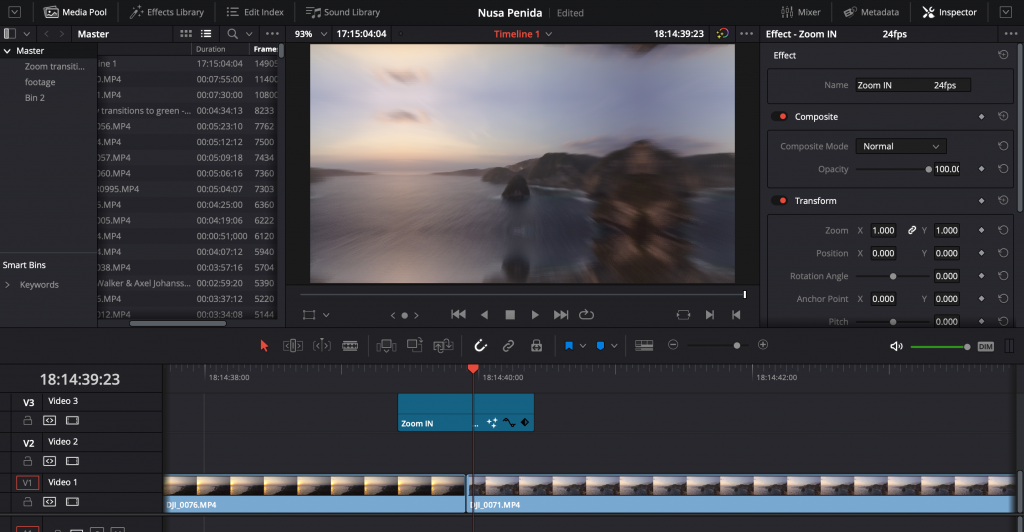
now when you pasted folder with transitions in to your current project you can double click each transition to preview the effect.
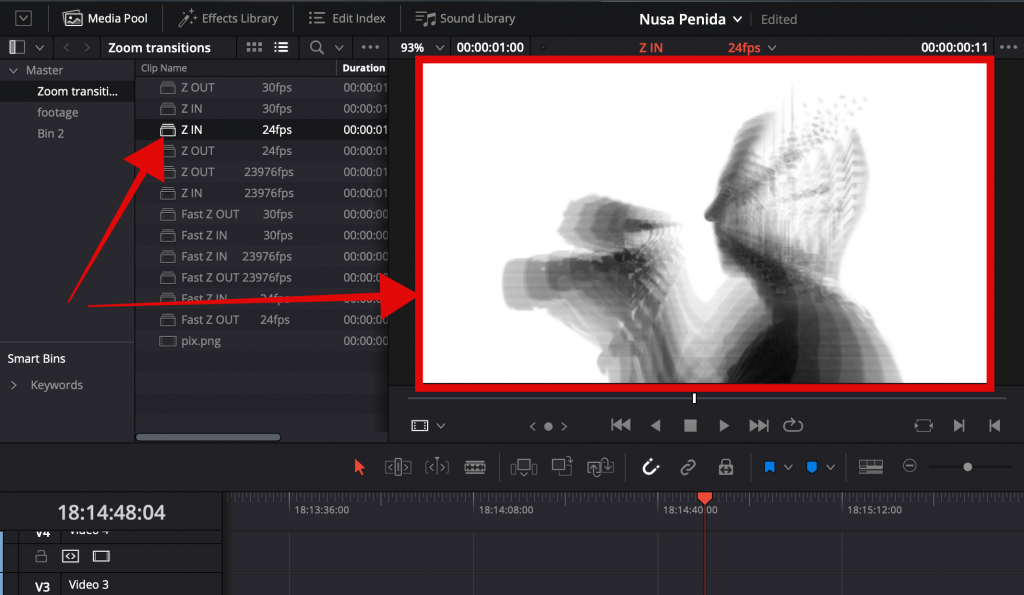
I like this “Z IN 24fps” (zoom in 24 frames per second). its important to match the fps of your timeline with transition . I have 24fps timeline so I can drag and drop this transition on top of my two clips where I want to use this transition. please note:if you edit in 30fps timeline choose “Z IN 30fps” (zoom in 30 frames per second)transition.

now right click on it and choose Decompose in Place
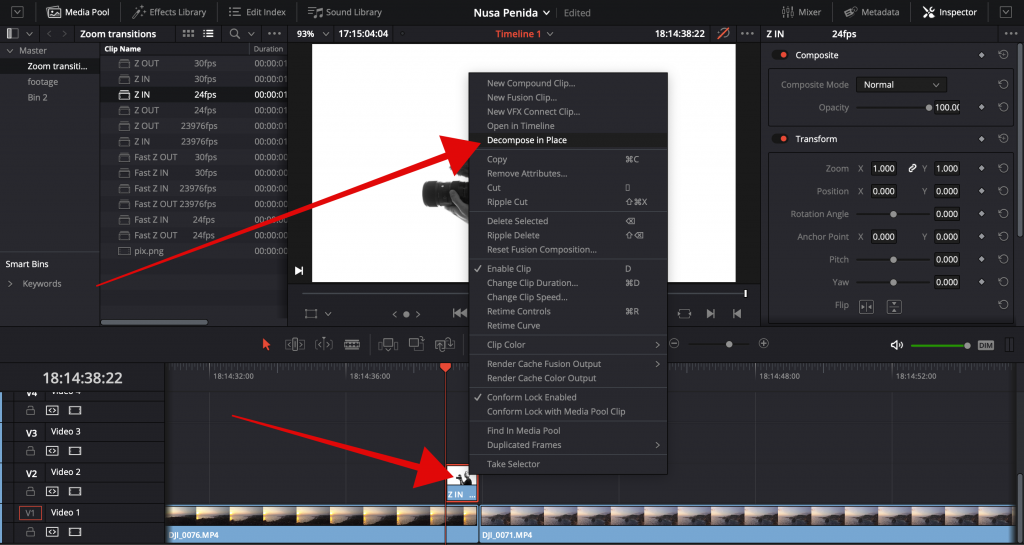
and you end up with this:

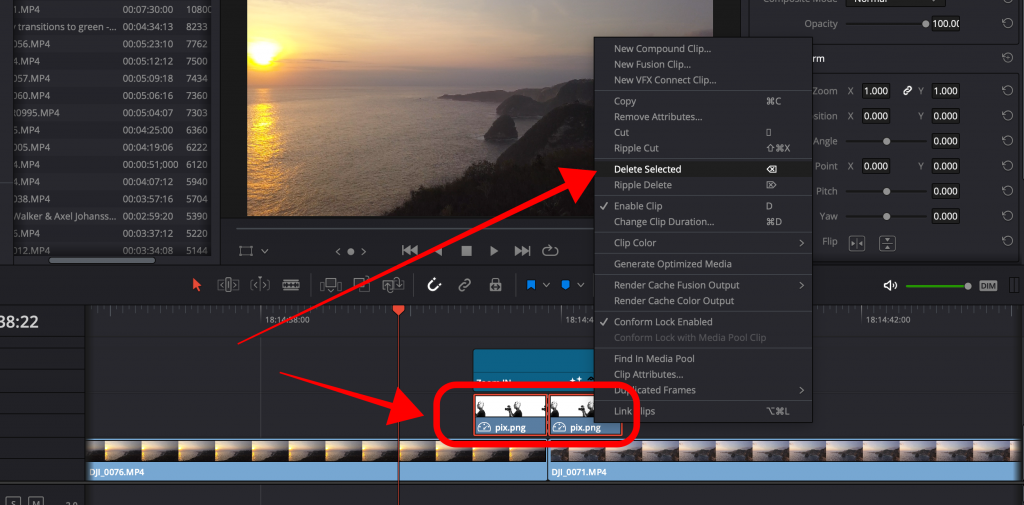
select all 3 clips and drag them to your cut make sure splits are lining up like so…

now go ahead and delete two “pix.png“files and you will have your transition applied. those two “pix.png”files are only for alignment and preview .
check out my FREE stuff here…
I will have video tutorial about this process, also if you need any additional help with transitions or other Davinci Resolve things , email me I will be more than happy to help.